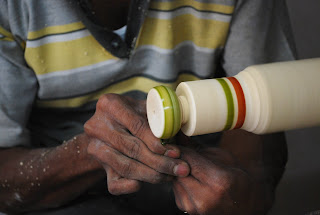
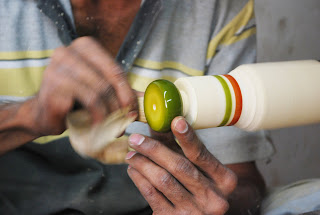
packaging design and visual identity was a completely new stage for me and i was really excited to do the packaging in a Eco friendly pack.
I started of by using cardboard cones which is sold as scrap from spinning mills and covering it with fabric stitched with the guidance of a textile student-aditi.
I tried to reduce the stitches in the making so i used old Tyre tube to hold the fabric in place.
walking down raja market i found these ready made pouches that fit the cones perfectly.
i felt this process of packaging was getting messy and over the budget.
moving on to working with cardboard and talking to a visual communication student- nalisha
we started to do more research and thinking of a way to see the product when its packed.
a dirty prototype with paper showing the opening in the sides.
paper templates for the packaging
first trial with cardboard. It was a good start where the top was safely packed but the packing space could be reduced.
packaging using recycle cardboard.
side profile where the top can be seen .
unwind the rope to open the package
outer pack opens where the user manual and story of the top is there.
Monday, March 29, 2010
The master piece
one of the most exciting stage of the project was to see the final prototype take shape. It was challenging because i had to work with a different artisan ( amjed ) since javid was not in town. It took amjed less than a day to understand and start making the prototype. The size was finalized and also how the joinery would be fitted during assembly had to be planned. Running back to SP-road for the joinery inset and back to channapatana the next day.
This was my last day for prototyping and all the joinery was set in place for assembly. Fear of the power cuts always in mind was leading me to fast production but i realized the quality of work was going down so i had to slow down the phase and pay attention to the details at every stage even though the time was limited.
choosing the right size of wood and cutting.
mounting it on to the lathe.
taking off the rough edges and making it smooth.
the top taking shape.
drilling for fixing the inset.
fine sandpapering for a smooth finish.
lacquering the wood
gloss effect using the palm leaf.
making the top tip.
making the base of the top.
making the circular winding gripper.
The top and base of the top was then assembled with the joinery parts which are standard parts readily available in the market.
Thursday, March 4, 2010
techno trial
Precession wood cutting can be achieved using laser cutting technology.
simple patterns were created to do the first trial ( illustrator sketch )
It was sad that i could not see the cutting process due to some company manufacturing rules but the end result was amazing.
wood laser cutting is a little expensive because there are very few companies that have this facility.
Sunday, February 21, 2010
kids spinn it at parikrma
The same exercise of creating patterns which was organised at parikrma in an organised fashion for the school children.
This exercise was part of sadhvi's workshop with the children, introduced as a break exercise for a short time.
The kids had fun making.
Paper pattern in motion
patterns created by the parikrma kids
kids spinn it at kenchanhalli
A fun exercise for kids to create new patterns and see it spin. It is simple.
The first exercise with the kids of kenchanhalli was interesting.
I made a template of the top in two views (side and top) and printed it out on an A4 sheet.
The kids used colors to fill in the template
Most kids used single color and they were not sure of how the
pattern would look when it is spun.
The circle is ready to to be cut out.
The circle is cut on the perforated guide line.
The cut circle is pressed with a board pin and the pointed
pin is used as a handle to spin the pin and the paper.
The paper top in motion.
Patterns created by the children.
Thursday, February 18, 2010
stage - 5
Manufacturing deal
Going around the industrial areas of Bangalore and talking numbers was a new experience.
i felt like a business man
I carried a sample of the joinery and the threading tools to make things easier.
Peniya - Bangalore industrial area
Talking to a freelancer to get the job done wa
s turning out to be to expensive as they where
looking at producing it in large quantity.
yelahanka old town
I got one sample made there with a metal lathe. it turned out to be a little cheaper, but
still expensive for one piece Rs 120
Moving to shivaji nagar and fixing a deal for less than half the price was the lease
i could go keeping in mind my time line.With the frequent power cuts the work was posponded
by two days. My presence at the work place was a must to get work done faster.
Top at test
The first prototype was taken to kenchanhalli to be played by the kids. They were happy to see me back at their playground waiting to open my bag. They were all excited to see the new designed top and they started spinning it
kid winding the rope (image below)
Take off position (image below)
Spinn off and land (image below)
The kid pull's up the spinning top and spins it in his hand
(image below)
Top secret unveiled (image below)
What, how, why..
Excited to know what it was, the kid spins the small top
he finds it difficult to spin with the broad handle
User test observations
The threading joinery worked well.
They liked the new design.
The size of the over all top can be reduced.
The handle of the small top can be re-worked.
Subscribe to:
Posts (Atom)